The Four Seals on Every Garage Door (and What Each One Does)
People say "garage door seal" as if it were one part, but a typical residential door relies on four distinct sealing components working together. When you understand what each one does, diagnosing a leak or draft gets much simpler, because the location of the problem tells you exactly which seal has failed.
The system as a whole is what separates a conditioned, dry, pest-free garage from an extension of the outdoors. A gap in any one component undermines the others, which is why it's worth inspecting all four whenever you notice a problem rather than replacing only the obvious culprit.
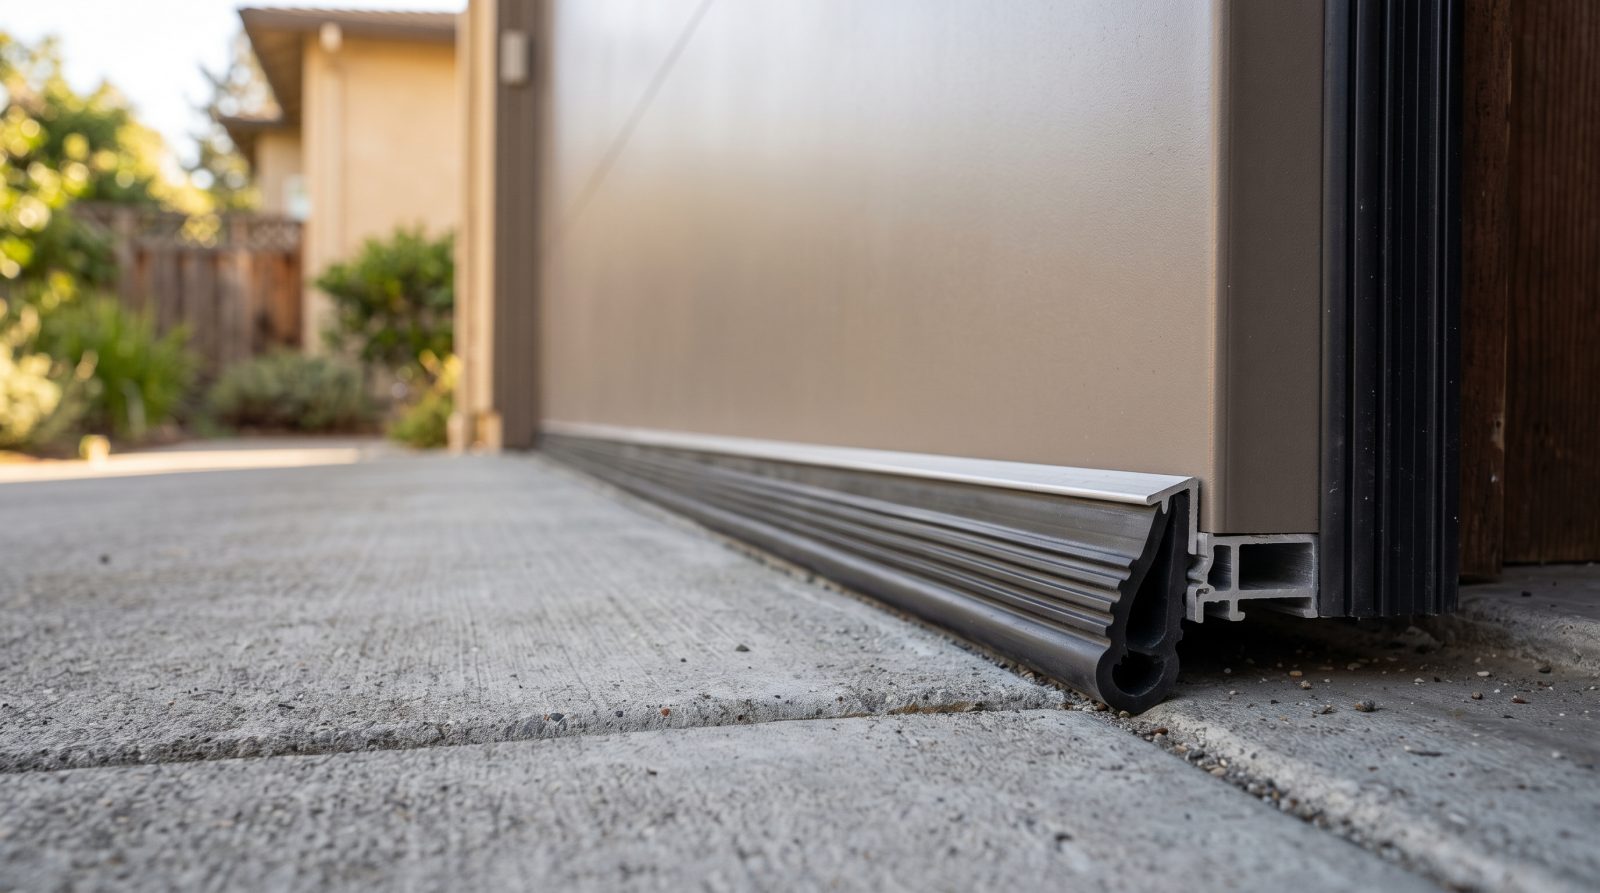
- Bottom seal (the astragal): The long rubber or vinyl strip running along the very bottom of the door that compresses against the floor. It's the hardest-working seal, takes the most abuse, and is the one most homeowners end up replacing.
- Bottom retainer or track: The aluminum channel (often a single or double T-style or P-style groove) attached to the bottom of the door that the seal slides into. Older wood doors may use a seal nailed or stapled on instead.
- Perimeter weatherstripping (door stop seal): The flexible flap mounted to the wood door stop molding around the two sides and the top of the opening, sealing the gap between the door face and the frame.
- Threshold seal: An optional rubber strip bonded to the garage floor itself, useful on uneven or sloped slabs where the bottom seal alone can't bridge the gap.
- Section joint seals: The interlocking weatherstripping between horizontal door panels that keeps wind and water from driving through the seams on sectional doors.
How to Diagnose Which Seal Is Failing
Before buying anything, spend ten minutes diagnosing. The symptom you're reacting to usually points straight to the failing component, and replacing the wrong one is a common and avoidable waste.
The simplest test is the daylight test: with the door closed, stand inside the garage during the day with the lights off and look around the entire perimeter and along the floor. Any light you see is air, water, and pests getting in. Run your hand along the edges on a windy day to feel for drafts you can't see. For the bottom seal specifically, close the door on a strip of paper or a dollar bill; if it slides out with almost no resistance, the seal isn't compressing properly.
Rubber and vinyl seals fail in predictable ways. They go brittle and crack in cold, dry climates; they soften, sag, and tear in sustained heat; and they can rot or grow mildew in humid or coastal areas. UV exposure degrades all of them over time. A seal that looks flattened, stiff, split, or that no longer springs back when you press it has reached the end of its service life.
- Water seeping under the door after rain: bottom seal worn, or the floor is uneven and needs a threshold seal.
- Daylight along the sides or top: perimeter weatherstripping on the door stop is compressed, torn, or missing.
- Leaves, dust, or snow blowing under: bottom seal cracked or no longer reaching the floor.
- Cold drafts inside an attached garage: any of the four seals, most often the bottom and the perimeter together.
- Whistling wind through the closed door: gaps at panel joints or at the top corners where seals meet.
Choosing the Right Bottom Seal: Types and Sizing
The bottom seal is the one you'll most likely replace, and getting the type and size right is the entire job. The seal must match how your door's bottom edge is built. Modern steel and aluminum doors almost always use an aluminum retainer with one or two grooves, and you buy a seal profile that slides into it. Older wood doors usually take a one-piece nail-on or staple-on seal.
Profiles are named for the shape they form. A bead or bulb seal (T-style, with two ridges that lock into a double-channel retainer) is the most common on contemporary doors. A P-bulb seal works well on doors with a single retainer groove and a slightly uneven floor, because the hollow bulb squashes to fill gaps. A J-type or T-type single-groove seal suits older single-channel retainers. If your door has no retainer at all, a flat or U-shaped nail-on seal is the answer.
Sizing has two dimensions that both matter: the width of the retainer groove (or groove spacing on double channels) and the length of the door. Measure the groove or groove-to-groove distance precisely, because a seal that's too narrow won't lock in and one that's too wide won't seat. For length, measure the full width of the door and buy a little extra; bottom seal is typically sold by the foot or in pre-cut kits, and you trim to fit. Standard residential doors are commonly 8, 9, 12, 16, or 18 feet wide, but measure rather than assume.
- Match the profile to your retainer: double-groove retainers take T-style/bead seals; single-groove take P-bulb, J, or T single profiles; no retainer takes nail-on seals.
- Measure groove spacing on double channels with calipers or a ruler before ordering; mismatched seals will not seat.
- Buy length to match door width plus extra for trimming; err long, never short.
- Choose material for your climate: EPDM rubber stays flexible in cold far better than cheap vinyl; vinyl can crack in hard freezes; TPE blends balance both.
- Consider a taller or P-bulb profile if your slab is uneven or worn, so the seal can bridge low spots.
Step-by-Step: Replacing the Bottom Seal and Perimeter Weatherstripping
With the right parts in hand, the replacement itself is straightforward on most doors. Work safely: a garage door under spring tension is dangerous, but the seals themselves don't require touching the springs. For the bottom seal you'll generally work with the door closed or only partly raised so you can reach the bottom edge comfortably.
For a retainer-style bottom seal, the old seal slides out the end of the aluminum channel. It can be stiff after years of weather, so spraying a little soapy water or silicone lubricant in the groove makes both removal and installation far easier. Feed the new seal in from one end, lining up its ridges with the grooves, and pull it through. Having a second person guide and pull helps a lot on wide doors. Trim the ends flush, leaving a small overhang to fully close the corners.
For nail-on seals on wood doors, pry off the old strip and any leftover fasteners, then position the new seal so it just contacts the floor when the door is closed and fasten it with galvanized roofing nails or screws. Don't pull it so tight that it folds under; you want gentle compression, not a permanent crease.
Perimeter weatherstripping on the door stop is the easiest of all. With the door closed, remove the old strip (often nailed or stapled to the wood molding), then position the new vinyl-flanged stripping so the flap rests lightly against the door face, sealing the gap without binding the door's travel. Start at the top, work down both sides, and nail it every foot or so. The flap should touch the door evenly along its full length when closed.
- Gather tools: utility knife or shears, tape measure, soapy water or silicone spray, pliers, and galvanized nails or screws for nail-on types.
- Lubricate the retainer groove before sliding seals in or out to prevent tearing and frustration.
- Trim seal ends to close the corners, leaving a slight overhang rather than cutting flush short.
- Set perimeter stripping for light contact only; over-tight weatherstripping makes the door bind, strain the opener, and wear prematurely.
- Test by closing the door and repeating the daylight and paper tests; adjust before you call it done.
Climate, Maintenance, and When to Call a Local Pro
Garage door seals are consumables, not permanent fixtures, and your region sets the pace of replacement. In northern and high-altitude areas, repeated freeze-thaw cycles and road salt are hard on rubber, and a seal can also freeze to the slab; homeowners there often get the best life from EPDM rubber and an occasional silicone treatment to keep it pliable. In the desert Southwest and other hot, sun-drenched regions, UV and heat are the enemies, and seals on south- or west-facing doors degrade fastest. Along the coast and in humid climates, salt air and moisture accelerate cracking and mildew, so more frequent inspection pays off. As a general rule, look your seals over twice a year and expect to replace a bottom seal somewhere in the range of every few years, sooner in harsh exposure.
A light maintenance habit stretches seal life considerably. Wipe the bottom seal and perimeter stripping clean a couple of times a year, keep the area under the door free of debris that grinds the rubber, and apply a silicone-based protectant (not petroleum products, which break rubber down) to keep seals flexible. In freezing climates, clearing snow and ice away from the bottom edge prevents the seal from tearing when the door is opened.
Most seal jobs are well within DIY reach, but some situations are genuinely better handed to a professional. If your floor is badly uneven or sloped and no off-the-shelf seal closes the gap, a pro can assess whether a threshold seal, a custom profile, or floor work is the real fix. If the retainer itself is bent, corroded, or pulling away, or if you find the bottom bracket damaged, that's adjacent to the spring and cable system and is not a place to improvise. And if you're seeing recurring water intrusion despite new seals, the underlying issue may be drainage or door alignment rather than the seal at all. A local technician can diagnose the whole system quickly and get the right parts on the first trip. If any of that sounds like your situation, request a free quote and have a pro take a look.
- Cold climates: favor EPDM rubber, keep seals lubricated, and clear ice so seals don't tear on opening.
- Hot, sunny climates: expect faster UV breakdown on sun-facing doors and inspect those more often.
- Coastal and humid areas: watch for mildew and salt-driven cracking; clean and inspect more frequently.
- Maintain twice a year: clean seals, clear debris, and use silicone (never petroleum) protectant.
- Call a pro for uneven slabs, damaged retainers or bottom brackets, anything near springs and cables, or repeat water intrusion that new seals don't fix.